


← Back to Installation Methods
Get Your Free Estimate Today
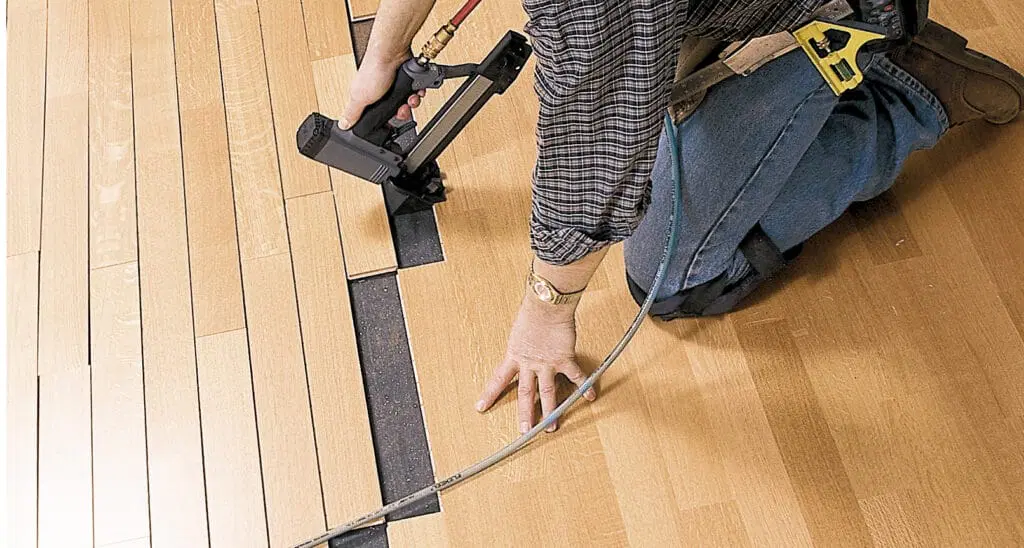
Staple down installation
Staple-down installation uses a pneumatic stapler with narrow-crown staples to secure hardwood flooring planks to wooden subfloors. The staples are driven through the tongue of the floorboards at an angle, ensuring they remain completely hidden beneath the boards. This method is particularly effective for engineered hardwood and prefinished flooring.
Materials Needed
- • Pneumatic stapler
- • Narrow-crown staples
- • Tape measure
- • Circular saw
- • Rubber mallet
Resources
Things to keep in mind:
- • Inspect the subfloor carefully to ensure it's structurally sound, properly fastened, and free of debris.
- • Use quality staples specifically designed for flooring. Poor quality staples can cause floor failure.
- • Maintain proper staple spacing as recommended by your flooring manufacturer for optimal holding power.
- • Staples must be driven at an angle through the tongue of the board to remain completely hidden.
- • First row installation is critical as it sets the pattern for the entire floor. Use screws or nails for maximum security.
- • Allow acclimation time of 48-72 hours before installation to prevent gaps and warping.
- • Maintain expansion gaps around the perimeter of the room to allow for natural wood movement.
- • Professional equipment is essential for proper staple installation. Do not attempt with hand staples.
- • Cannot be used over concrete subfloors. Staple down requires a wood subfloor.